I just did my Kimber Montana stock literally a couple hours ago.
It was easier than expected.
It was spur of the moment. I needed spray paint for something else. Ended up working on several projects this evening.
After finding the paint I wanted, I went to the craft section of Walmart and found a small pack of "natural sponge" pieces. Had like 5-6 small chunks of sponge.
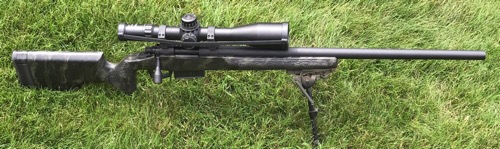
My stock was the slate blue Kimber.
I started with black. First several splotches did not go as they did on paper. Way too much pressure on my part. Light dabs is better IMO.
Then did a slate blue color.....then a light color. Then redid black really lightly just to break everything up again.
![[Linked Image from i.postimg.cc]](https://i.postimg.cc/FsjhbkW3/IMG-20200929-224205328.jpg)
To apply the paint, I sprayed the sponge itself pretty generously. Not dripping but it was wet.
Depending on what you wanna achieve, I think mine would looked better if I was more random with the orientation of the sponge. Twist your hand all different ways as you dab.
I then hit it with a matte clear a couple times. It's now drying. I am happy with how it turned out. I didn't want to fill the texture of the stock so I kept the slate blue as a base coat and used colors that worked well with that base color.
It's easy.....and if you don't like how it's looking, let that color dry and go over it with something else.
I've never tried it till this evening and I'm no artist ..lol


![[Linked Image from i.postimg.cc]](https://i.postimg.cc/gkMNTNTW/IMG-20200930-002924285.jpg)
![[Linked Image from i.postimg.cc]](https://i.postimg.cc/qMB1w9Qw/IMG-20200930-002906719.jpg)