I'm a fairly new member here but have managed to glean a few things from a few posts so I thought I should at least say hi and tell the story of two 1899s. This post will be a conglomeration of a couple of different posts from other sites where I discussed each gun separately along with some of the issues I had with one of the guns.
For as long as I can recall, there has been an old Savage 1899B in .303 Savage hanging on the wall at my dad's place. I think the last person to use it for hunting was me when I was about 14 and I'm closer to 60 than 50 now so that tells you the amount of dust it's accumulated. Over the years I mentioned to my dad a few that if he was ever going to sell it I would be interested. He purchased it used in the mid to late 50s and I have no knowledge of its life before that time. During a recent visit, dad and I chatted about various things and the topic came around to the old Savage. He disappeared for a bit and returned with the rifle... the handover was complete.
I didn't know much about these old beasts at the time but to say I've become "intimate" with them in the last year would not be an exaggeration. I'm not sure I've ever seen my dad clean a rifle and this one had surely shown the brunt of that. I knew there should be a window to see the round counter through but the port was pretty much smoothed over with oil and dirt. I needed to really clean this thing up. Here's the "before" picture.
I've had many guns apart over the years but this was my first 99. It all seemed pretty straight forward so away I went. A number of Youtube folks had warned of not taking the carrier assembly apart so I avoided that at all costs. In reality, this thing just needed a good cleaning and a little protection of the wood and metal. I'm not a collector and I absolutely intend to hunt with this gun so making it able to survive some rain and mud was my main goal. The biggest issue that I had with it was that someone had grabbed it in a vise at some point and there were jaw marks on it. Those had to go... or at least get filed smooth. Reblueing this gun just isn't an option for me as I don't want it looking new, I just want it functional and presentable. Therefore I was happy just to rust blue it in a few spots, give it a severe rubbing with oil and a vigorous wipe down. I'm pretty happy with how it came out. The screwdriver marks aren't mine but it's pretty obvious that she's been opened up a time or two over her life. The serial number says she was built in 1908.
Now, fast forward a couple of months and a fellow I know is looking to sell an old rifle. He posted it on a local hunting site that I follow and low and behold, it's a twin to the one I just cleaned up. I'm not sure why I thought they should be together but I decided it was necessary. This one was brand new in 1900 but bringing it back to life was a more sordid story.
When I first got my hands on it, I noticed that the ejector wasn't operating quite as it should. It seemed to flop around a bit and you had to lift it up and over in order to chamber a round. Time to tear this one down. I wasn't into it all that far when I discovered the root of the problem. The ejector (or auto cutoff) rotates about the end of the carrier. This connection seemed to be in a sad state. I figured I needed to remove the carrier but after removing the retainer pin, the carrier was still bound in the hole. It would rotate but it just didn't want to pull out. I pried ever so gently on the forward end of the carrier assembly and it moved almost immediately. A few more gentle nudges and out it came. The carrier looked to be in great shape but the bore in the auto cutoff where the carrier slides into is pretty buggered. I couldn't tell if someone had pressed a new sleeve into the cutoff or whether this is what it's supposed to look like. The boss on that end of the cutoff looked like it had been beat on pretty hard too. Worst case, I could machine a new bushing and press it into the cutoff bore. Everything else seemed to be in decent, 119 year old shape.... NICE!
It appears that someone had turned down the head of the bolt that runs through the carrier. I'm not sure why but that doesn't really matter now. It also appears that they pressed some sort of bushing into the ejector but it had crumbled away over time. I'm not sure if it was lead or soft cast iron but as soon as I poked at it a bit it just fell away. Now I had a couple of pieces that no longer fit together and it was obvious that I was going to have to ignore all those Youtubers that had warned me about the dreaded carrier disassembly. I read enough to know that the bolt through the carrier was left hand thread and in all honestly, that's pretty much all you need to know. I'm not really sure what all the fuss is about. It's a body, a bolt, a spring, a nut and there's only one way they all go together. I've now had it apart a number of times and there's no great mystery to it. At this point I thought that my best bet was to turn a small sleeve to press fit onto the turned down bolt head. I decided to make it out of brass and add a bit of red Loctite as I pressed it on.
I machined up a new bushing but left it over diameter and over length. I changed my mind on the Loctite and went with JB Weld. Mostly for the gap filling ability of JB Weld but also because I couldn't find my red Loctite. I would finish machine the whole thing after the adhesive set up. With the epoxy set and the machining complete, it was time for a quick bluing. The assembly doesn't look as vintage as some might like but this is a tool for me, not a museum piece. I stuffed it back in the hole and she's good to go again. Hopefully my repair lasts as long as the original.
I now had two rifles cleaned, repaired and ready for action. I was originally referring to them as sisters but my wife figures they're more like Thelma and Louise from the movie of the same name. Sisters in mischief!
I mucked around for a bit trying to find a suitable reloading recipe for them and finally settled on 180 grain round nose Hornady Interlocks and IMR 3031 powder. Since they had both been significantly disassembled, the process of sighting in the front, rear and tang sights took a bit of time. I was quite happy to get through the process in about 25 rounds. After tapping the sights around I managed to get the grouping in the photo below at 50 yards. I'm quite happy with that.
Once they were sighted, I wanted to confirm that the 180 grain round nose Hornady Interlocks were the right choice. I lined up a few milk jugs and let one fly. The weight after recovery showed 93% retention. I'll take that any day!
All in all, I think the results were fantastic.
I hope you enjoyed my story and I look forward to using both of these rifles for a good long time. If all goes as planned, each will be used to take a nice black bear this spring.
I like that video. I'm going to start saving mild jugs.
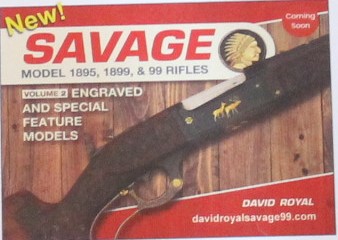
wyo1895 With Savage never say never. For a copy of my book on engraved Savage lever actions rifles send a check for $80 to; David Royal, p.o. box 1271, Pinedale, Wy., 82941. I will sign and inscribe the book for you. [email protected]
Great job, love seeing folks keeping these great old guns working.
I’m not sure about 1908 for that first one though, the straight buttstock rather than perchbelly tells me it’s earlier than that. What’s the serial number range on the gun?
“The Savage 99 Pocket Reference”. All models and variations of 1895’s, 1899’s and 99’s covered. Also dates, checkering, engraving.. Find at www.savagelevers.com
Great job, love seeing folks keeping these great old guns working.
I’m not sure about 1908 for that first one though, the straight buttstock rather than perchbelly tells me it’s earlier than that. What’s the serial number range on the gun?
Not sure which picture you're looking at but they both of the perch belly stock. The serial numbers are 13,3XX an 80,2XX.
The top one definitely doesn't have a perchbelly stock, that didn't start until a few years later. Perchbelly is a curve on the bottom of the buttstock. But in this last picture, the 80.2xx does look as though it has a slight perchbelly. Not as much as normal, but it varies.
“The Savage 99 Pocket Reference”. All models and variations of 1895’s, 1899’s and 99’s covered. Also dates, checkering, engraving.. Find at www.savagelevers.com


![[Linked Image]](https://uploads.tapatalk-cdn.com/20190218/1689c2387ead9c1f63753a6566cf4185.jpg)
![[Linked Image]](https://uploads.tapatalk-cdn.com/20190219/61e1060c61308e94f4243dc6dde962fb.jpg)
![[Linked Image]](https://uploads.tapatalk-cdn.com/20190219/c4b291247ce744ba0486dc1a9a9262ad.jpg)
![[Linked Image]](https://uploads.tapatalk-cdn.com/20190219/121b461fe990c34a8eb5790883535f24.jpg)
![[Linked Image]](http://uploads.tapatalk-cdn.com/20190226/bb4007138b122cdd44021f09a60f2fe8.jpg)
![[Linked Image]](http://uploads.tapatalk-cdn.com/20190226/ada2469afcadefc824b3428cd4ca9074.jpg)
![[Linked Image]](http://uploads.tapatalk-cdn.com/20190226/04bd605db88d7f5703a01571d3f5511b.jpg)
![[Linked Image]](http://uploads.tapatalk-cdn.com/20190226/f9fd8d90a2bf57d0a7a1f204bc5c0a32.jpg)
![[Linked Image]](http://uploads.tapatalk-cdn.com/20190226/8a75df1c9b21f5c02698a707ff3327dd.jpg)
![[Linked Image]](http://uploads.tapatalk-cdn.com/20190226/18e413f5030c8f6266bf603f3fe3a98c.jpg)
![[Linked Image]](http://uploads.tapatalk-cdn.com/20190226/d7a13c1099ce2adee4f1d98a623a5dfc.jpg)
![[Linked Image]](http://uploads.tapatalk-cdn.com/20190227/f3a82b32a00a7b277e92d67ab3abcb22.jpg)
![[Linked Image]](http://uploads.tapatalk-cdn.com/20190227/614b19c7cf2982e9615fd16ce40ae356.jpg)
![[Linked Image]](http://uploads.tapatalk-cdn.com/20190227/09358c53997f292dc752d91e5ea993a6.jpg)
![[Linked Image]](http://uploads.tapatalk-cdn.com/20190227/b920809d40fe2196d21068e70410e370.jpg)
![[Linked Image]](http://uploads.tapatalk-cdn.com/20190411/15b60222fa0e23a8bb2dbb36bb775e64.jpg)
![[Linked Image]](http://uploads.tapatalk-cdn.com/20190411/ab0c3b9883a03960179d58b5787f6b64.jpg)